GUI Guide
This guide explains how to use the Mocking GUI Panel.
Panel Overview
You can open the panel by clicking the Mocking GUI toggle button at the bottom of your application.
1. API Tab (Mocks)
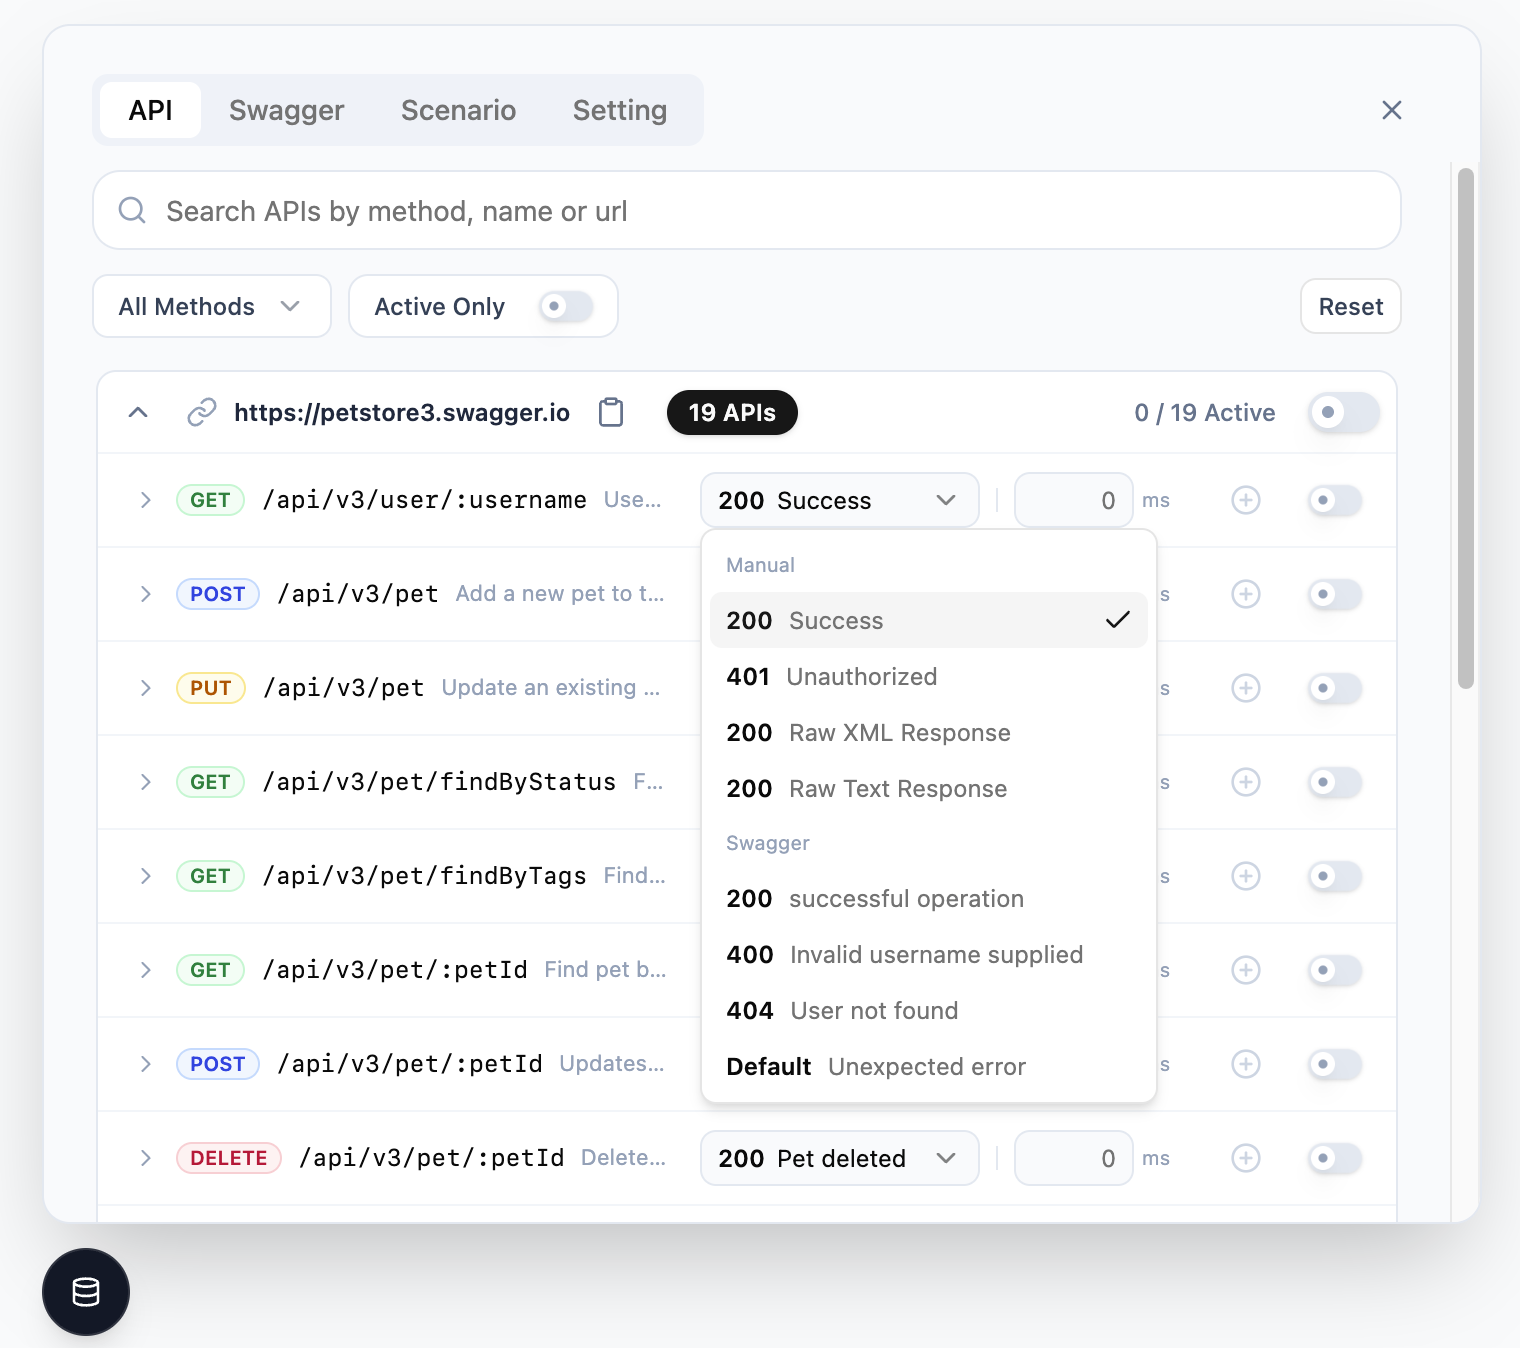
View and control the list of all registered API handlers.
Search & Filter
- Search: Search by URL or handler name.
- Method Filter: Filter handlers by HTTP method.
Handler Control
- Mode: Choose Auto (dynamic), Manual (custom defined cases), or Swagger (imported examples).
- Delay: Simulate network latency (ms).
- Active: Toggle mocking ON/OFF.
- Scenario Draft (⊕): Select handlers to save as a group in the Scenarios Tab.
Details View
Click on a handler to expand and view the response body and headers.
2. Swagger Tab
Import API definitions from Swagger/OpenAPI to use their response examples.
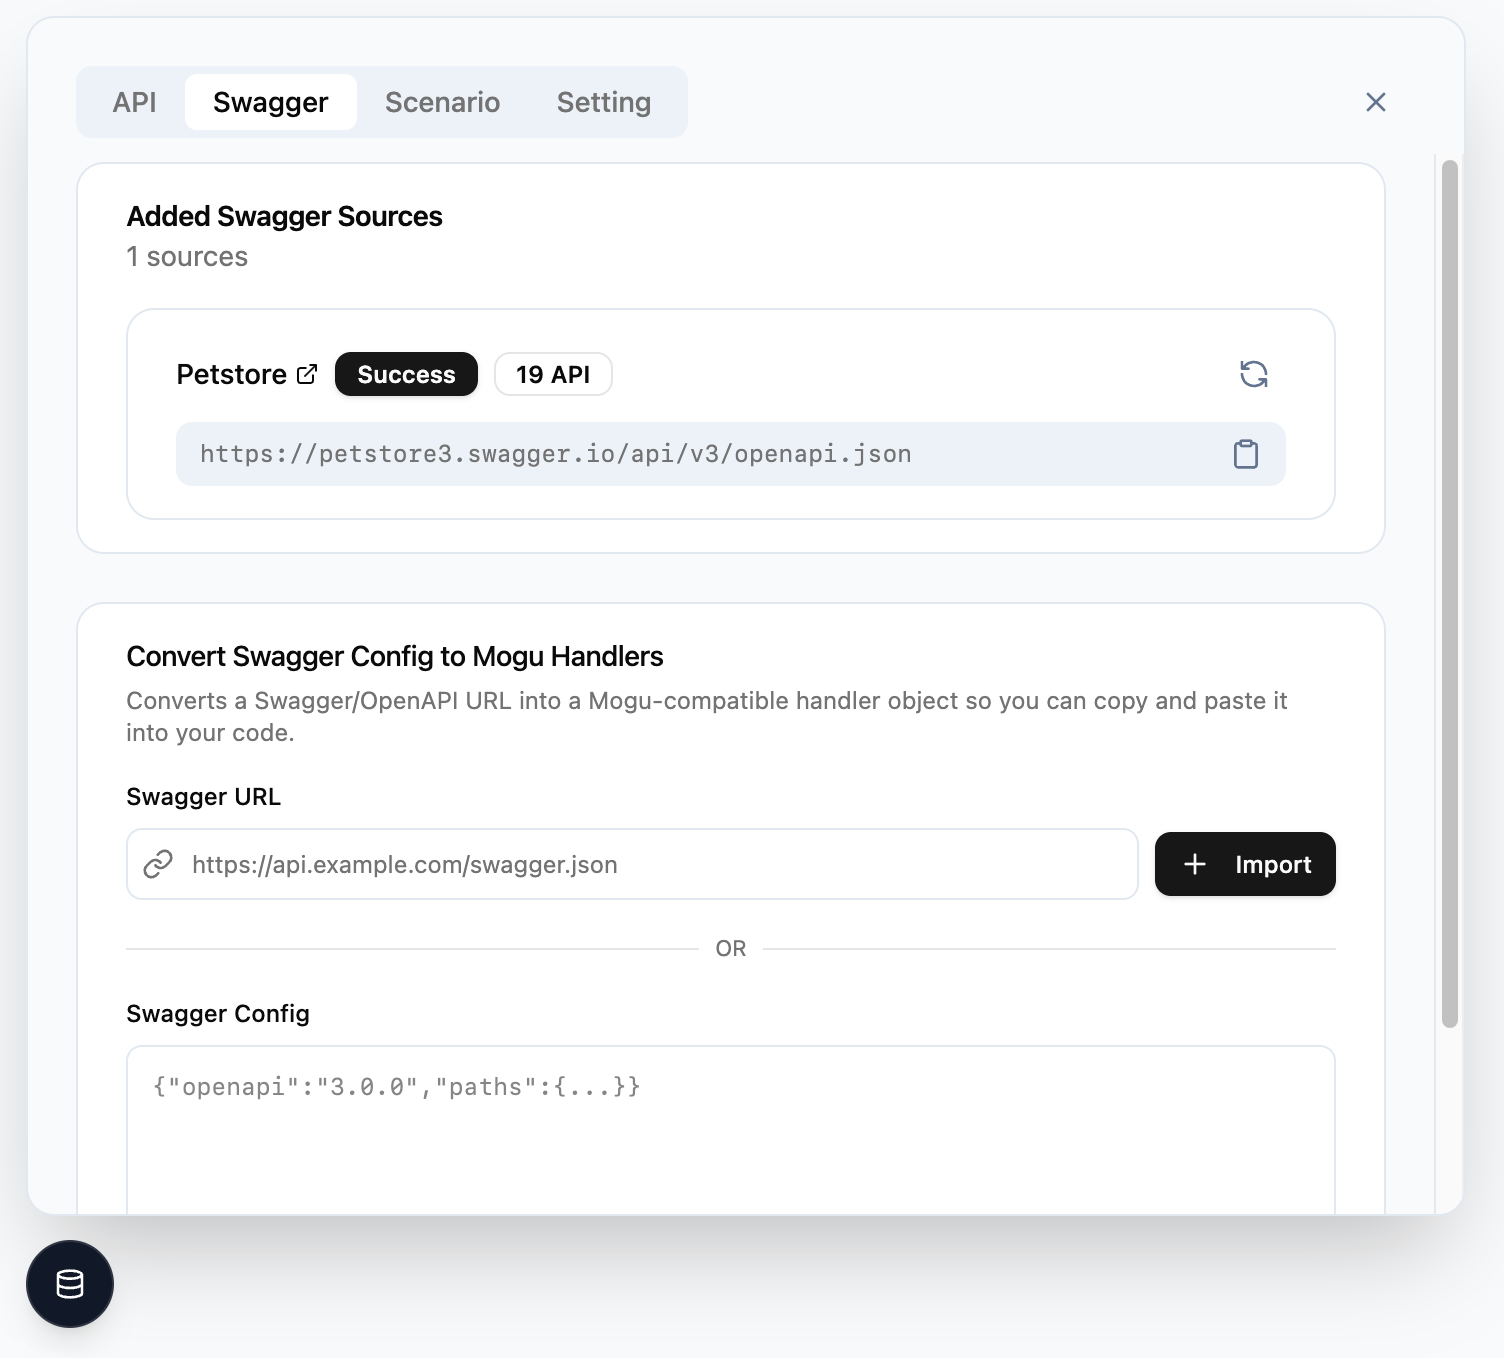
Import Sources
- Swagger URL: Enter the URL of
swagger.jsonand click Import. The fetched JSON is displayed, which you can copy and add to yourconfig.tsto register it as a permanent swagger source. - Swagger JSON: Paste raw JSON content and click JSON Import to preview it the same way.
Note: Adding a source in this tab does not permanently save it to your swagger configuration. The import feature is intended for previewing the JSON and copying it into the
swaggerarray inconfig.ts.
3. Scenarios Tab
Manage "Scenarios", which are saved combinations of handler states.
Quickly reproduce complex states like Login Success + Cart Items or Server Error.
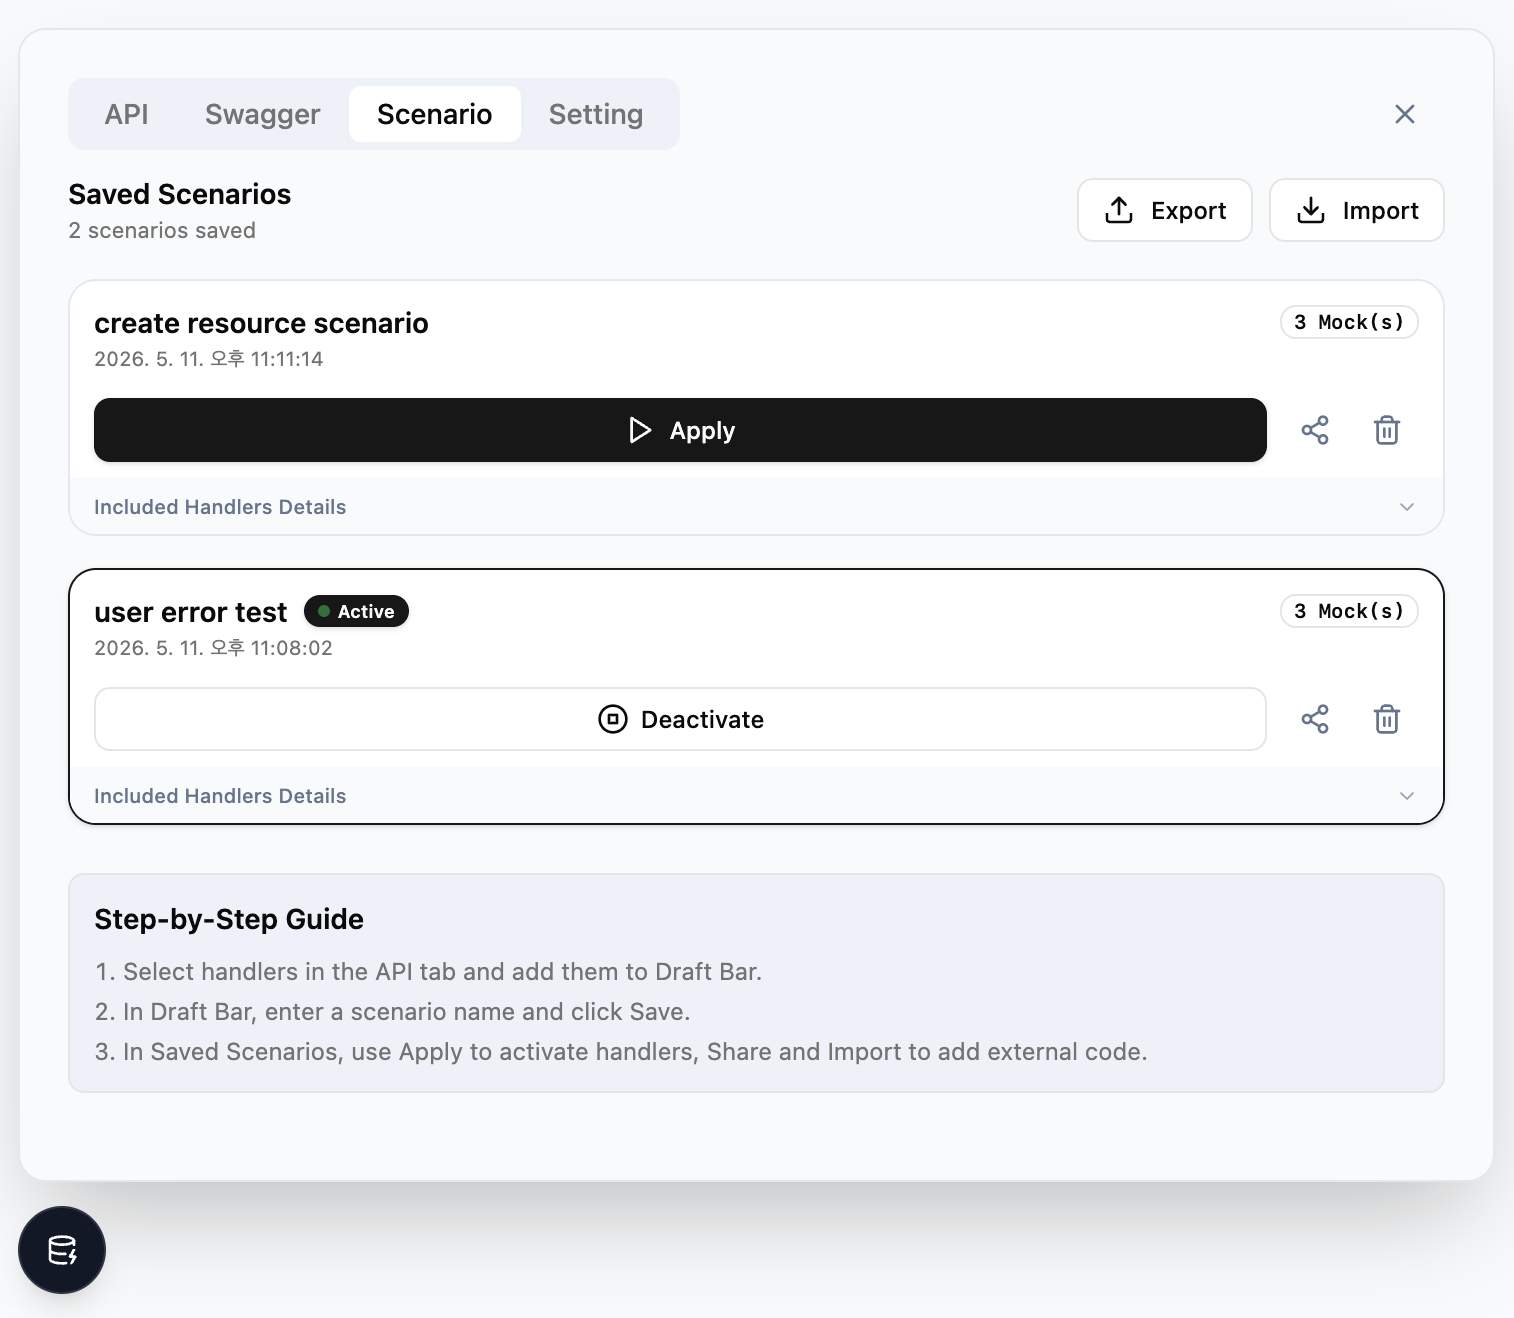
Workflow
- Draft: In API Tab, click ⊕ on handlers to add them to the draft.
- Save: In Scenarios Tab, name and save the draft.
- Play: Click ▶ to apply the saved scenario instantly.
Helpful for sharing critical test cases that need to be reproduced frequently.
4. Settings Tab
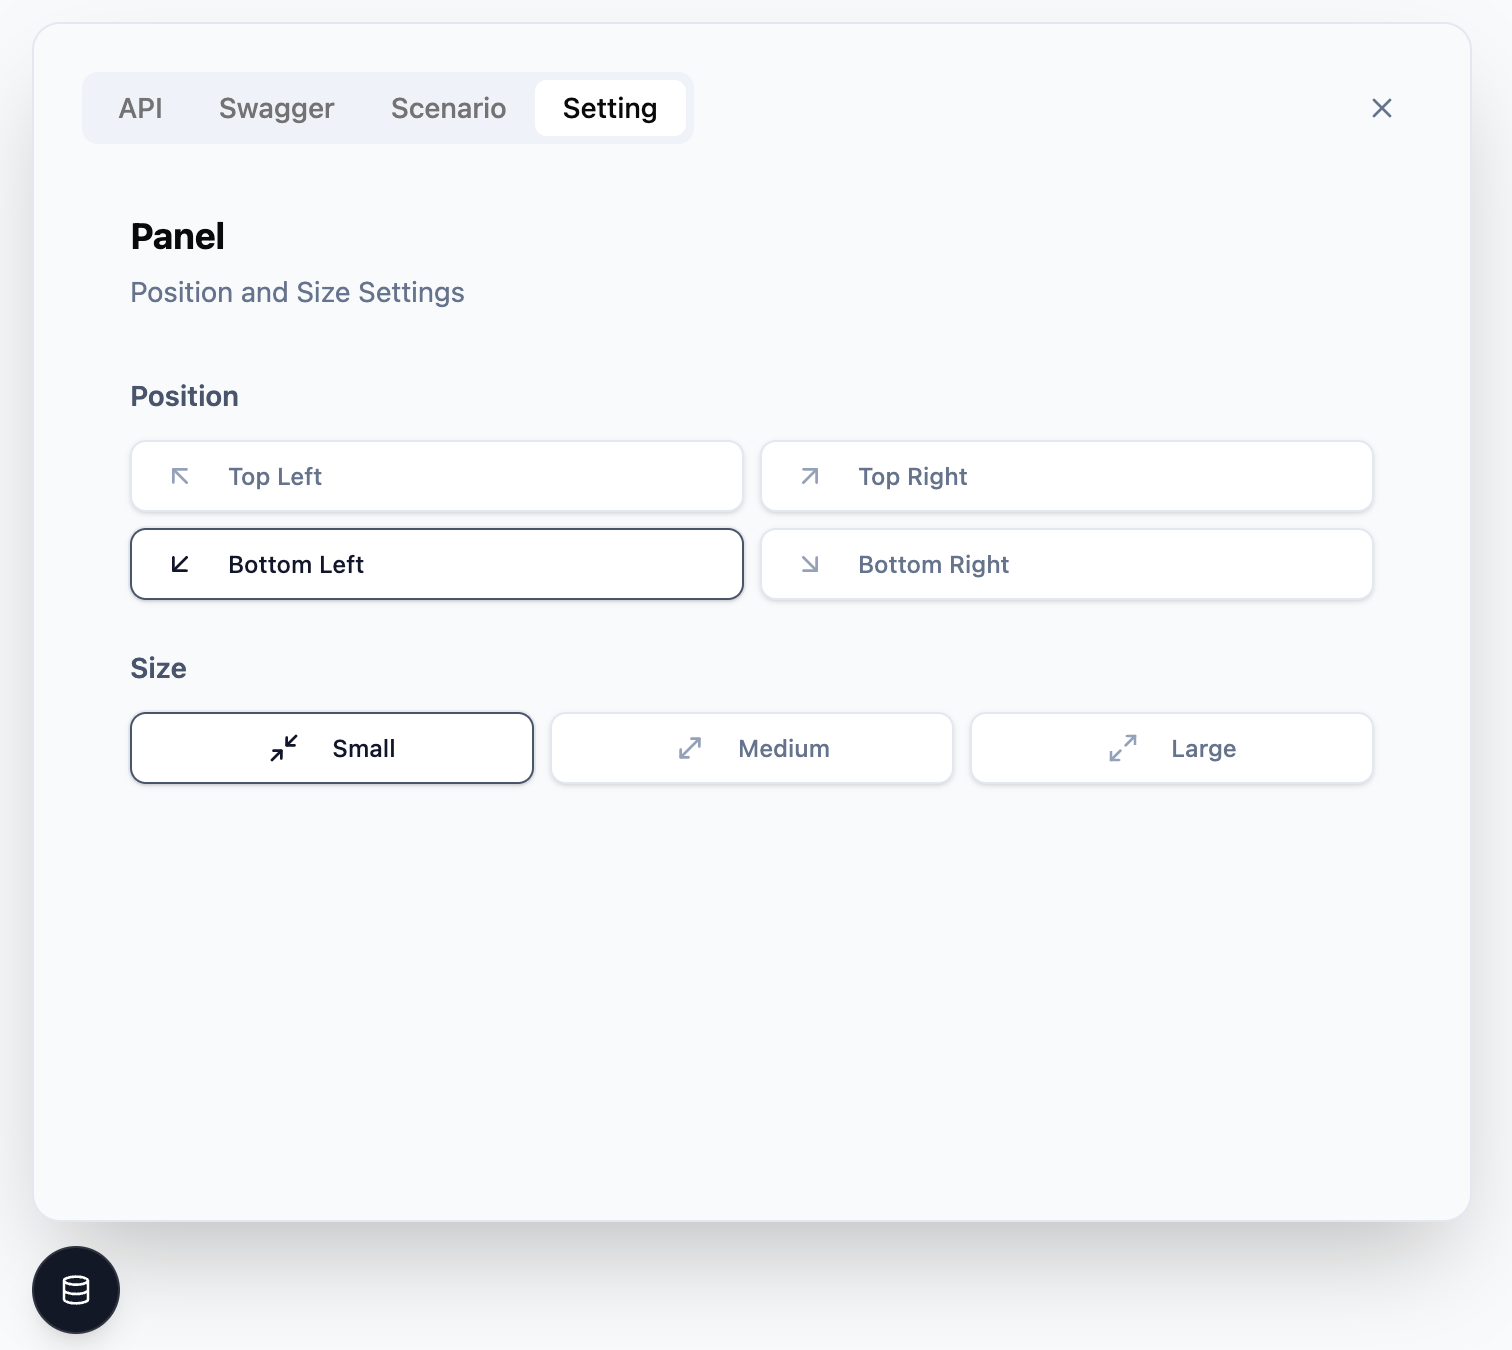
Manage panel settings.
- Position: Set the panel's position (e.g., Bottom Left, Top Right).
- Size: Adjust the panel's size (Small, Medium, Large).